



Frequently asked questions
Why can I not use my acrylic brush for poly gel?
Because the two need opposite things from a brush. Kolinsky hair is built to carry monomer and release a bead, and poly gel plus slip solution sticks to it, mats it, and ruins the point. Poly tools use synthetic hair, which releases gel cleanly and survives slip solution. Poly gel also needs a spatula to place and rough out the bead before any brush touches it, which is why most of the tools on this page are dual-ended with a spatula at one end.
What is the difference between a poly gel tool and a builder gel brush?
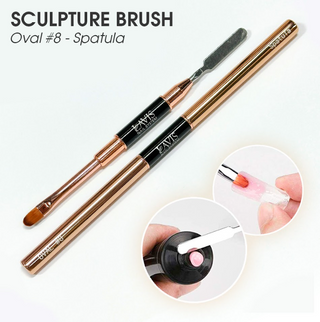
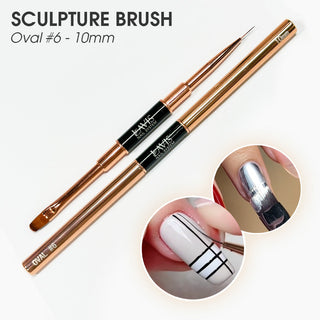
Poly gel does not level itself, so the tool has to push, shape, and smooth: a spatula to place the bead and a synthetic brush damped with slip solution to flatten it. Builder gel in a bottle is self-levelling, so the brush mostly places the product and controls the apex, and a plain oval brush does the job. The liner end on the LAVIS double-ended brushes is what draws a French smile or a straight line without picking up a second tool.
How much slip solution should be on the brush?
Less than most techs use. Dip and wipe on a lint-free towel so the brush is damp rather than wet: a soaked brush thins the gel, flattens the apex, leaves a pitted surface after curing, and gives a weaker set. If the gel is still sticking after that, the brush is the wrong type rather than the solution being insufficient. Alcohol is not a substitute, because it evaporates too quickly and leaves the gel tacky in the wrong way.
How do I keep these tools usable?
Clean before curing, never after, because cured gel on a brush or spatula is permanent: wipe the tool as soon as the bead is placed. Keep it away from the lamp, since a tool lying beside a curing hand picks up stray light and hardens. Wipe with alcohol or slip solution and dry rather than soaking in acetone, keep separate tools for poly and acrylic to avoid cross-contamination, and reshape the brush by hand before storing it flat.
What is on this page
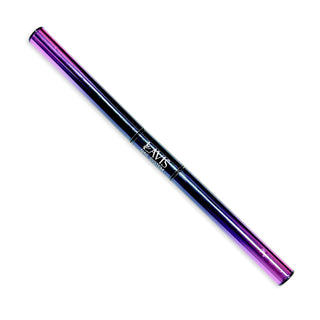
Nine listings at wholesale for the tools used with poly gel and builder gel, three of them out of stock as this page was written. Four come from LAVIS, including three double-ended sculpting brushes and a poly gel brush, and five are unbranded dual-ended gel pens and a stainless steel sculpting tool listed in two head shapes and a set.
The tools and what each one is for
| Tool | Ends | What it does |
|---|---|---|
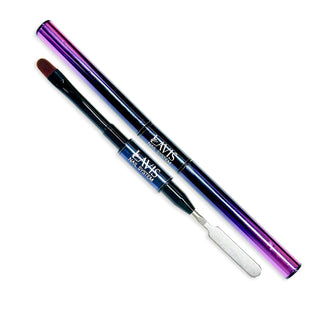
| LAVIS Double Ended Oval #8 and 20 mm liner | Oval brush and long liner | Sculpting one end, long straight lines and French smiles the other |
| LAVIS Double Ended Oval #6 and 10 mm liner | Oval brush and short liner | Smaller sculpting head with a liner for detail work |
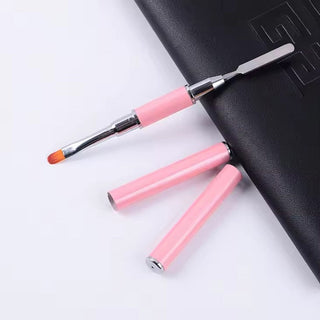
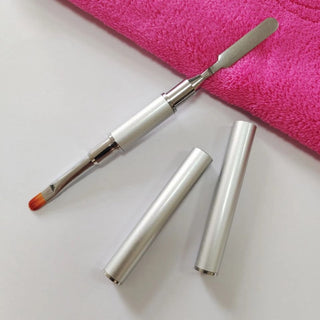
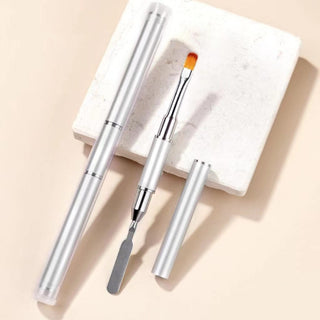
| LAVIS Double Ended Oval #8 and spatula | Oval brush and spatula | The classic poly gel pairing: spatula to place and shape, brush to smooth |
| LAVIS Poly Gel Brush | Single | A dedicated poly brush for techs who prefer a separate spatula |
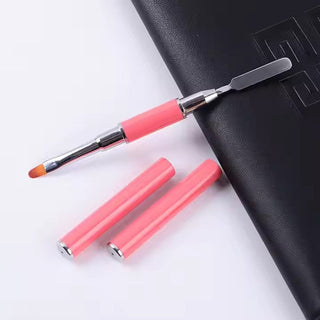
| Dual-ended gel pens | Brush and spatula | Listed in several handle colours, the everyday poly tool |
| Stainless steel sculpting tool | Two heads, 63 and 64 | Cutting and sculpting; listed singly and as a set |
Why poly gel needs its own tool
Poly gel sits between acrylic and hard gel: it is thick enough to hold its shape like a bead but it does not set until it is cured, so the tool has to push and smooth rather than carry and place. A spatula moves the bead onto the nail and roughs out the shape; the brush, wetted with slip solution, then flattens and blends it without the gel sticking to the bristles. An acrylic brush is the wrong tool here, because Kolinsky hair holds slip solution badly and poly gel will ruin it.
Builder gel in a bottle is different again. It is self-levelling, so the tool's job is mostly placement and apex control rather than shaping, which is why a simple oval brush and a steady hand do most of the work.
Head shapes at a glance
Three tools from the page


Specifications at a glance
| Attribute | What to look for | Why it matters |
|---|---|---|
| Brush hair | Synthetic, not Kolinsky | Slip solution and poly gel destroy natural hair; synthetic releases the gel cleanly |
| Spatula end | Metal, thin, slightly flexible | Places and shapes the bead without tearing it |
| Liner length | 10 mm for detail, 20 mm for long lines | A long liner pulls a straight smile line in one stroke |
| Handle | Balanced, not front-heavy | Poly work is slower than acrylic, so grip fatigue shows sooner |
| Steel heads | 63 cutting and sculpting, 64 sculpting | For carving and cleaning the cuticle line before cure |
| Cleanability | Wipes clean with alcohol or slip solution | Cured gel on a tool is permanent |
Using a dual-ended tool on a poly gel set
- Prep and form. Prep the natural nail, fit the dual form or tip, and have the slip solution open before any gel is cut.
- Cut a bead. Take a bead of poly gel from the tube with the spatula end and place it on the form or nail.
- Rough the shape. Push the bead towards the free edge and the sidewalls with the spatula, not the brush.
- Dip the brush in slip solution. Lightly, then wipe; a soaked brush thins the gel and leaves it slumping.
- Smooth and set the apex. Pat and press rather than stroking, working the apex into place before it is cured.
- Cure, then refine. File the shape after the cure, and use the steel tool to clean the cuticle line if any gel crept onto the skin.
Slip solution, and using less of it
The most common fault in poly work is too much slip solution. The gel stops holding its shape, the apex flattens, the surface looks pitted after curing, and the set is weaker than it should be. A brush should be damp rather than wet: dip and wipe on a lint-free towel before it touches gel. If the gel is still sticking, the brush is the wrong type rather than the solution being insufficient. Alcohol is not a substitute for slip solution; it evaporates too fast and leaves the gel tacky in the wrong way.
Caring for a poly and builder gel tool
- Clean before curing, never after. Cured gel on a brush or a spatula is permanent, so wipe the tool as soon as the bead is placed.
- Keep it out of the lamp. A tool laid on the table next to a curing hand picks up stray light and hardens.
- Wipe with alcohol or slip solution, then dry; do not soak a brush in acetone.
- Keep separate tools for poly and acrylic. Cross-contamination ruins both.
- Reshape the brush by hand after cleaning, and store it flat with the head protected.
Common faults, and which end of the tool caused them
- A flat apex. The brush was too wet, or the bead was smoothed before it was shaped with the spatula.
- Gel on the cuticle. The bead was pushed from the centre outwards rather than from the cuticle line towards the free edge; the steel head cleans it before curing.
- A pitted surface. Slip solution left standing on the gel, which cures as tiny craters.
- Drag marks. The brush was stroked rather than patted, which pulls the gel instead of levelling it.
- A thin free edge. The spatula pushed too much product back towards the cuticle at the start, leaving nothing for the tip.
- A brush that has gone hard. Gel was left in the bristles, or the tool was laid beside a lamp mid-cure.
Building an apex with a dual-ended tool
The apex is the part of a poly or builder set that decides whether it survives a month, and it is built with the spatula before the brush ever touches the gel. Place the bead slightly behind where the high point should sit, push it forward towards the free edge with the spatula so the product thins at both ends, then use the damp brush to pat the shape level. Check the profile from the side of the finger rather than from above, because an apex that looks right from overhead is usually too far back. Cure in two stages where the gel is thick: a short flash cure to set the shape, then the full cure.
Which tool for which service
For poly gel extensions the dual-ended spatula-and-brush is the default, and a salon doing them daily should have one per tech. For builder gel in a bottle, an oval brush is enough because the gel levels itself, and the liner end is what makes a French or a straight line possible without a second tool. For heavy sculpting and cuticle work, the steel tool replaces a wooden stick and holds up to cleaning, which is why many techs keep one on the tray even if they work mostly with brushes. Where a salon is buying its first set, the double-ended oval with a liner covers the widest range of work.
How many tools a station needs
Fewer than for acrylic, but not one. A tech doing poly gel daily needs her own dual-ended tool, because sharing means a tool is always mid-clean when it is wanted, and a second one so a set is never started with a brush that still has gel in the bristles. The steel sculpting head can be shared across a station, since it wipes clean in seconds and does not hold product the way a brush does. A salon adding poly gel to its menu for the first time gets further with one good double-ended brush per tech than with a large kit of single-purpose tools that nobody has learned yet.
Replacement is driven by the bristles rather than the handle. Once a brush splays or a corner of the head has hardened, it stops levelling cleanly and starts leaving drag marks, and no amount of cleaning brings it back. That is the point to replace it, not when the handle looks worn.
Wholesale pricing at ND Nails Supply
Every tool on this page ships at wholesale pricing for everyone, with no business license, no minimum order, and no membership fee. Free shipping on orders $100+, and in-stock tools ordered before 2pm PT on weekdays leave the same day.