
What’s even more sophisticated than a classic French manicure? A micro-French manicure, of course! The thin line makes all the difference.
If you want to know how to do a micro-French manicure, you’re in the right place. It’s simple to create with gels, dip powder, or lacquers. Let’s talk about what you need and how to get started.
DIY Micro French Nails
First, pick your polish. Beginners may prefer gels or lacquers as there are fewer steps involved to complete the manicure.
The Benefits of Nail Lacquer for Micro-french Nails
Nail lacquer is great if you change your manicure each week. It doesn’t require a lot of time or money to use. Since nail lacquer air dries, you don’t need a nail lamp to cure it.
Nevertheless, it’s still smart to use a base coat for better adhesion and a top coat for chip-free results. A quick-drying top coat helps you finish faster.
If you’re on a budget, go with lacquer. Just remember that lacquers can be tricky because they dry quickly and the color on top may dissolve the color underneath. Be sure the lower coats are completely dry first.
The Advantages of Gel Polish for a Micro-french Manicure
A gel manicure lasts up to three weeks as it’s more resistant to chipping than lacquer. Gel polish is easy to work with as it won’t dry until it’s cured with a nail lamp. If you don’t like the way it looks, wipe it off and do it again before curing it.
Another benefit is that gel polish has a pleasant scent as it has no solvents like nail lacquer. But if you're worried about exposing your skin to UV rays to cure it, you'll need to apply sunscreen or wear fingerless gloves. These steps keep the skin from premature aging.
The Pros of Dip Powder for Micro-french Nails
Dip powder nails are even more durable than gels, lasting up to four weeks. Moreover, you don’t need a nail lamp to do them. The liquids air dry. The only downside is that it’s a little pricier than gels or nail lacquer to get everything you require.
Once you’ve chosen the type of polish to use, here are the other supplies you’ll need.
Other Supplies Needed for a Micro-french Manicure
You’ll need your usual manicure tools to prep your nails.
- Round up clippers, a file, a cuticle pusher, and cuticle oil. Trim up the nails and push back the cuticles first.
- If you’ll be applying gels, you’ll need a nail lamp. It also helps to have lint-free wipes if you need to wipe the polish.
- And if you’ll be putting on nail tips, remember to use clear adhesive.
- A French dip mold makes it easier to get a smile line on a dip powder manicure. However, be aware of how deep it goes – you don’t need much depth for micro-French nails.
- A tiny liner brush is perfect for freehanding the tips of the nails.
- Otherwise, you can use line art gel that comes with a narrow brush in the bottle.
Now that you’ve got everything ready, let’s get started!
Steps for the Perfect Micro-french Manicure
- After your nails are prepped, apply a base coat. Lacquer, gels, and dip powder all have base coats. What’s the point? A base improves adhesion so that the manicure is less likely to lift. It also keeps your nails from getting stained by the polish.
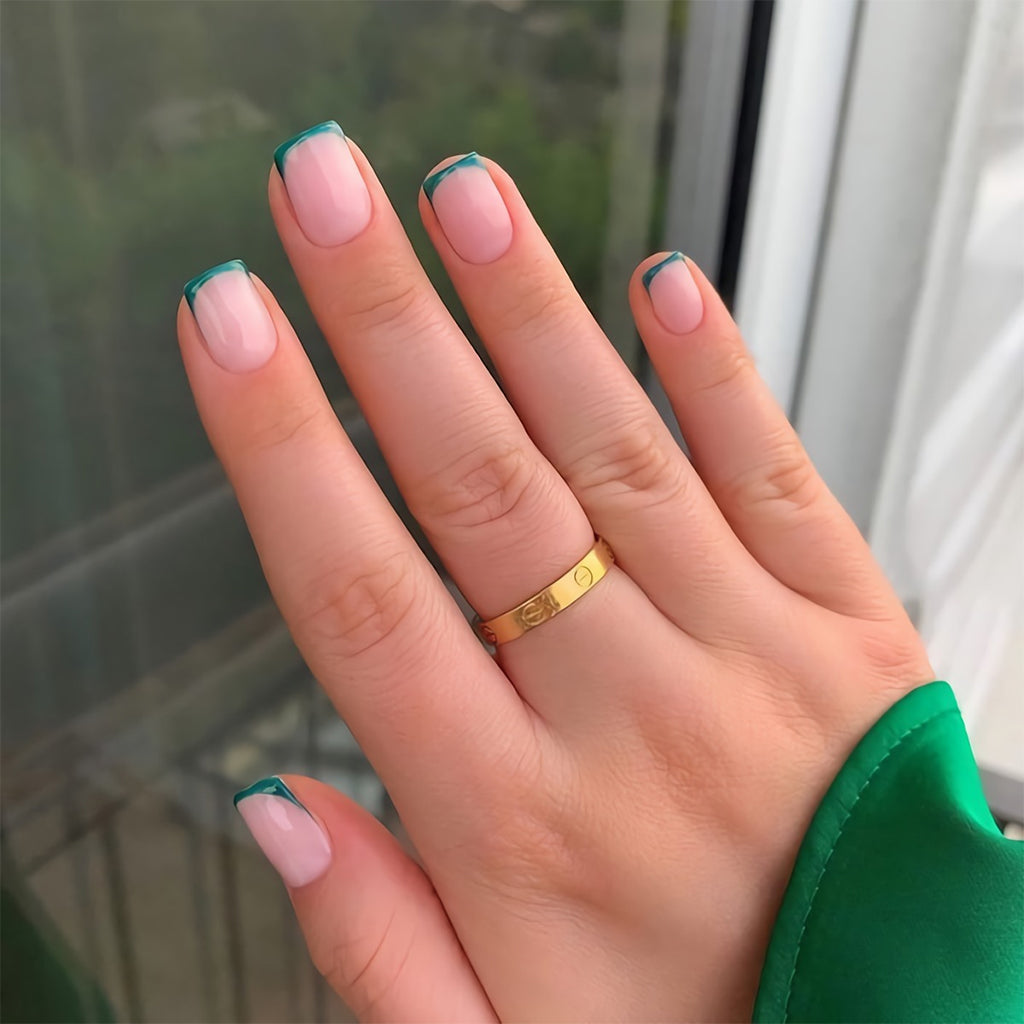
- Next, apply the colored polish. Milky shades are popular this year as are jelly nudes. Keep things elegant with nude polish and a white tip. Otherwise, style it up with any colors you choose. We’ve seen gorgeous combinations like green with a gold tip or sheer white with a black tip.
- If you want to disguise the tip of your natural nail, apply enough coats to make the color opaque.
- Finish with a glossy top coat and don’t forget to cap the edges to prevent chips.
Micro-french Manicure Hacks
If you’re having trouble getting the perfect curve, we completely understand. There is a legit way to cheat, however. You’ll need a silicone makeup sponge to use as a nail stamp.
Paint the sponge with a stripe of whatever color you’re using for the tip of the nails. Then gently press the nail into the painted part. It will stamp onto the end of the nail – ta-da! Instant smile line with no brush needed.
If you don’t have a tiny enough brush, you can also use a bobby pin or a dotting pin to paint the curve. You might want to decant a few drops of polish onto a palette instead of dipping the tool into the bottle. It’s easier to control how much polish you pick up that way.
Micro-french Nails: Should You Go Long or Short?
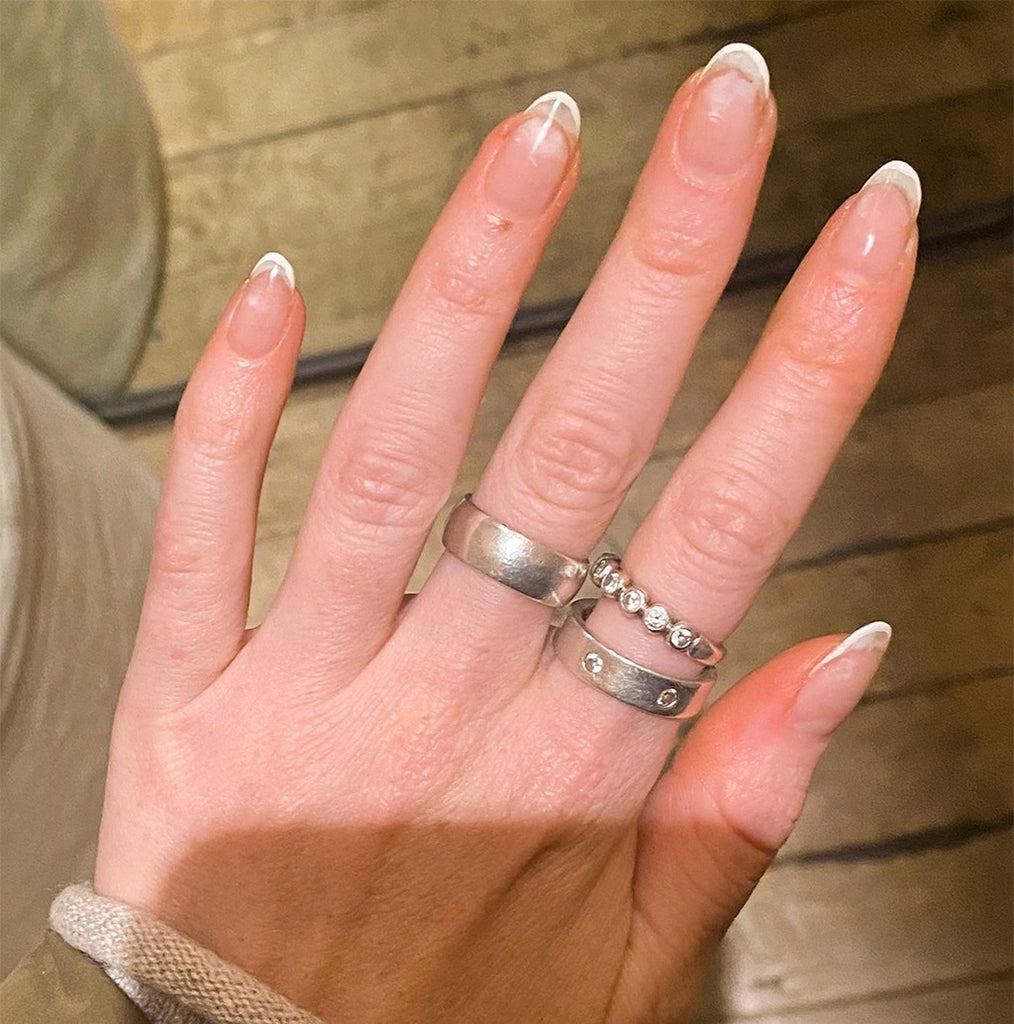
Should you add extensions or keep the nails short? Since the micro-French look suits any nail shape, it’s really up to you!
FYI: Almond nails are hot this year and they look fabulous with a micro French manicure.
Can You Use Line Art Gel for a Micro-french Manicure?
It’s a brilliant idea to use line art gel for a French manicure. The only downside is that the tiny brush might still be too big for the very thin line you need to draw. Check out this video to see liner gel in action.
Can You Add Nail Charms and Nail Art to a Micro-french Manicure?
True micro-French nails are a minimalist design. Purists would tell you to choose a nude or milky polish that matches your skin tone and stick to white tips only. It's meant to be clean, sophisticated, and low-key.
But if you want to glam up this modest manicure, go for it! Subtly enhance it with glitter at the tips or go all out with neon ombre nails and black smile lines.
Conclusion
Now that you’ve mastered the art of the micro-French manicure, what colors will you try next? Check out our deals to stock up on all the nail care things you need.