Almond nails are fashionable, elegant, and surprisingly easy to create. It's no wonder that almond nail designs are trending. If you want to know how to do almond-shaped nails, you're in the right place.
Supplies Needed to Do Almond Nails
If you’ll be using your natural nails for this manicure, you only need a nail file or nail drill to shape the nails and create the distinctive almond shape.
Otherwise, you’ll need nail extensions and adhesive, a nail lamp, and polish.
For Natural Nails:
- Nail files, preferably medium and fine grits to shape the tips.
- Buffing block for a natural shine or to prep the nail for polish.
- Cuticle pusher and cuticle oil for a beautiful finish.
To get the best results, your natural nails need to be a little longer than the tips of your fingers. That’s why you might want to use nail tips or press-on nails.
For Nail Tips:
Of course, you’ll need to prepare the natural nails before applying the tips. This includes pushing back cuticles and removing the shine from the surface of the natural nails. Then you’ll need:
- Almond-shaped nail tips (it’s easiest to apply nail tips that are already in an almond shape instead of reshaping coffin nails or stilettos).
- Adhesive for the tips.
- UV or LED lamp to cure the adhesive.
- Nail file or nail drill to prep the nails and perfect the tips if needed.
- Polish and nail art supplies if desired.
Now, let’s talk about nail prep. Preparation is essential for a beautiful and long-lasting manicure.
How to Prepare Before Doing Almond-shaped Nails
Trim your nails if needed and push back the cuticles. Cuticle remover can make this part go faster. Leaving the skin on the nails is a recipe for disaster. It will cause the polish or adhesive to lift.
If you’re applying tips, buff the nails to remove the shine. This helps the nail glue stick better.
How to Do Almond-shaped Nails
The almond shape is wide at the base, slimmer on the sides, with a rounded tip. It’s an elegant choice between long, narrow stilettos and oval nails. Most importantly, the shape is flattering for pretty much everyone.
When you file your nails into an almond shape, don’t spend a lot of time on the sides at first. File from underneath and work diagonally from the edges toward the center. Move the file in a single direction only, not back and forth. Take your time.
Make the rounded point of the tip mirror your cuticle. It might be easier if you use a washable marker to draw a line down the center point of each nail.
It can be difficult to make all the nails look the same, so be patient. It’s better to remove too little than too much of the nails.
If this all seems like too much work, you might have more fun applying tips:
Lavis - Almond Short Nail Tips
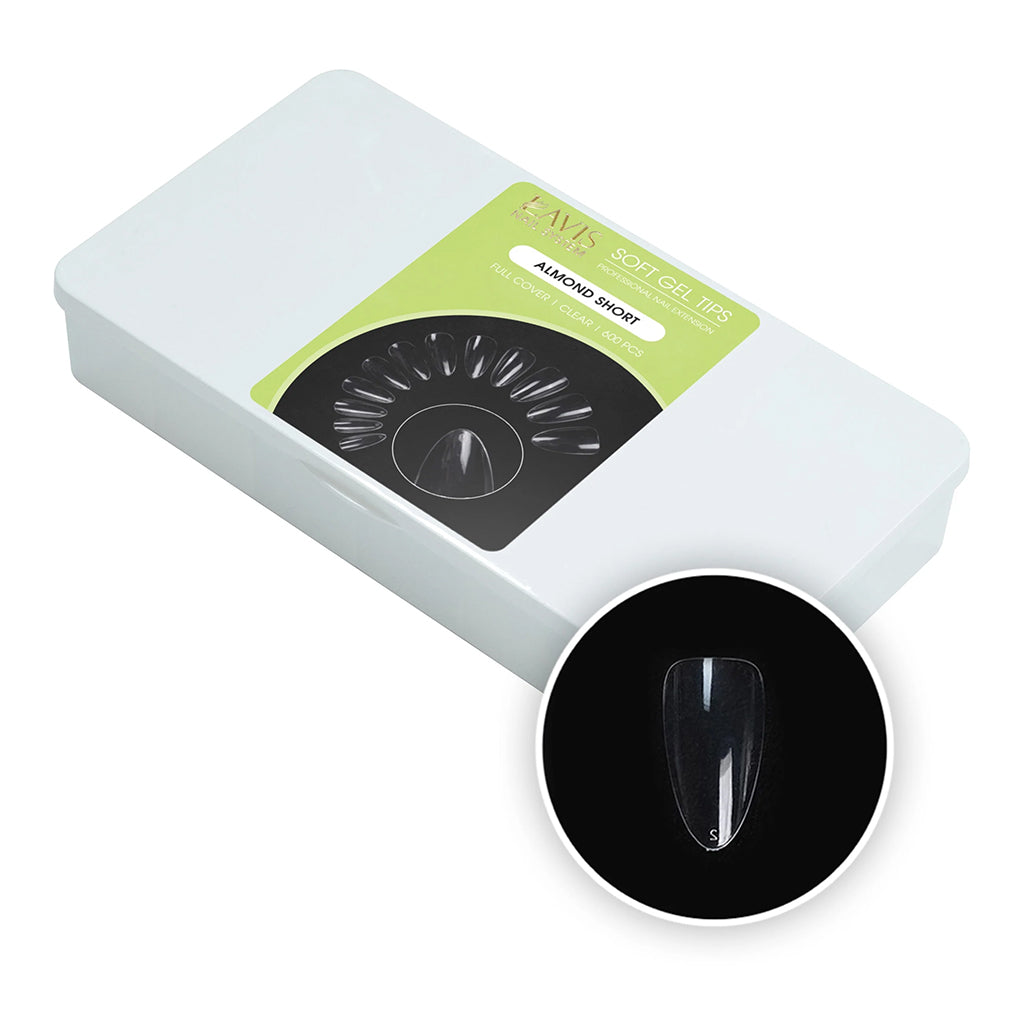
For best results, these soft gel tips cover the entire natural nail. They are sturdy and long-lasting, yet they may be cut and shaped if required. Moreover, they come in different lengths from short to long.
After you apply them, they’re compatible with gel polish, acrylics, and dip powder. All you need is a nail lamp and the tip adhesive below.
Lavis Nail Tip Kit
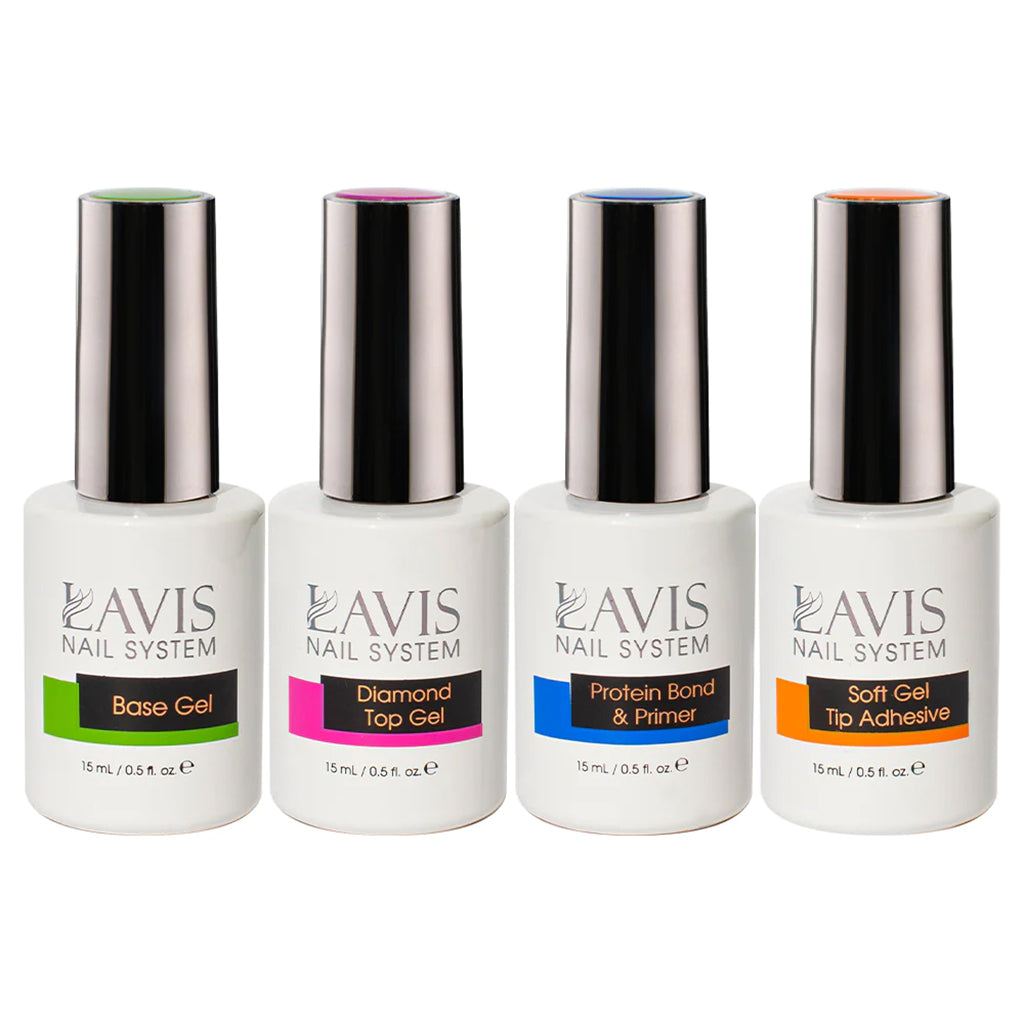
This package includes a gel base coat, a diamond top coat, a protein bond and primer, and a soft gel tip adhesive. It’s everything you need to do almond-shaped tips.
After applying the adhesive, cure each nail for 10 seconds to secure the tip. Then cure the whole hand for 30 to 60 seconds before finishing the manicure.
Tips for the Perfect Almond-shaped Look
It helps to have an almond or a picture of an almond or almond-shaped nail handy as a reference. It also makes it easier to shape the nails correctly if you draw a straight line down the middle of the nail from the cuticle to the free edge.
Feel free to cheat with curved-edge nail clippers. They can get the shape started for you and save a lot of time filing.
But if you'll be filing, it's good to know which type of nail file to use for almond-shaped nails. For example, don't use coarse (80 or 100-grit) files on your natural nails. This texture is best for shaping gels, acrylics, and nail enhancements, or removing the same.
Instead, use medium grit (180 to 220) to file the free edge of the nail. But never use this type of file on the top of natural nails.
Finally, a fine grit file (240 to 600) is ideal for smoothing a finished manicure. You can also use it to remove the shine off of the natural nail before applying polish or tip adhesive.
Then, there’s an even easier way to get almond-shaped nails:
Press-on Nails
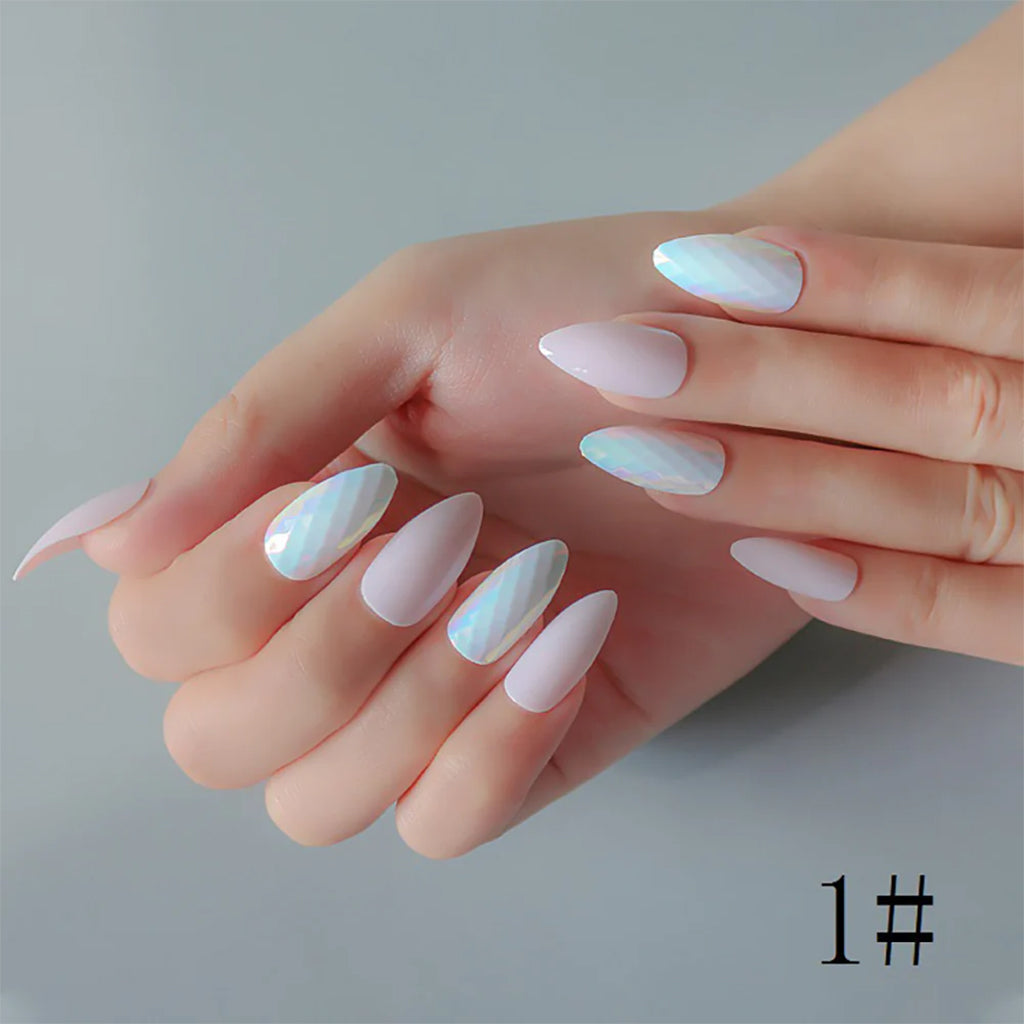
You guessed it. Press-on nails will give you a polished, perfect shape with minimum effort. We like the pearlescent finish on the accent nails in this package. However, feel free to jazz them up with nail art or change the color with gel polish.
Can You Make Almond-shaped Extensions with Acrylics, Polygel, or Hard Gel?
If you enjoy sculpting extensions, it’s fun to do long almond nails with acrylics, hard gel, or polygel. Acrylics will air-dry while you’ll need a UV lamp to cure the gels. Use a mold to help you get the proper shape.
What Nail Designs Look Good on Almond-shaped Nails?
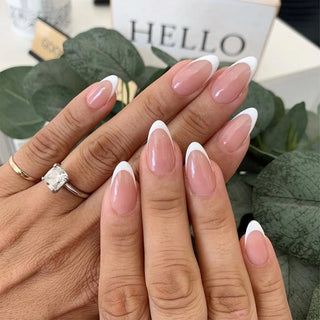
We’re fans of the French manicure and its many variations on almond nails. The almond shape already makes the fingers look longer and more elegant. Then, the thin line of color at the tip enhances the effect. Micro-French tips are especially stunning.
Feel free to experiment with different styles like aura, donut, and cat’s eye almond nails. You can have so much fun with these designs that work so well with the almond shape.
Conclusion
Hooked on nails? Check out our deals page to see the latest sales. Remember that we offer free shipping on orders over $100, too!