
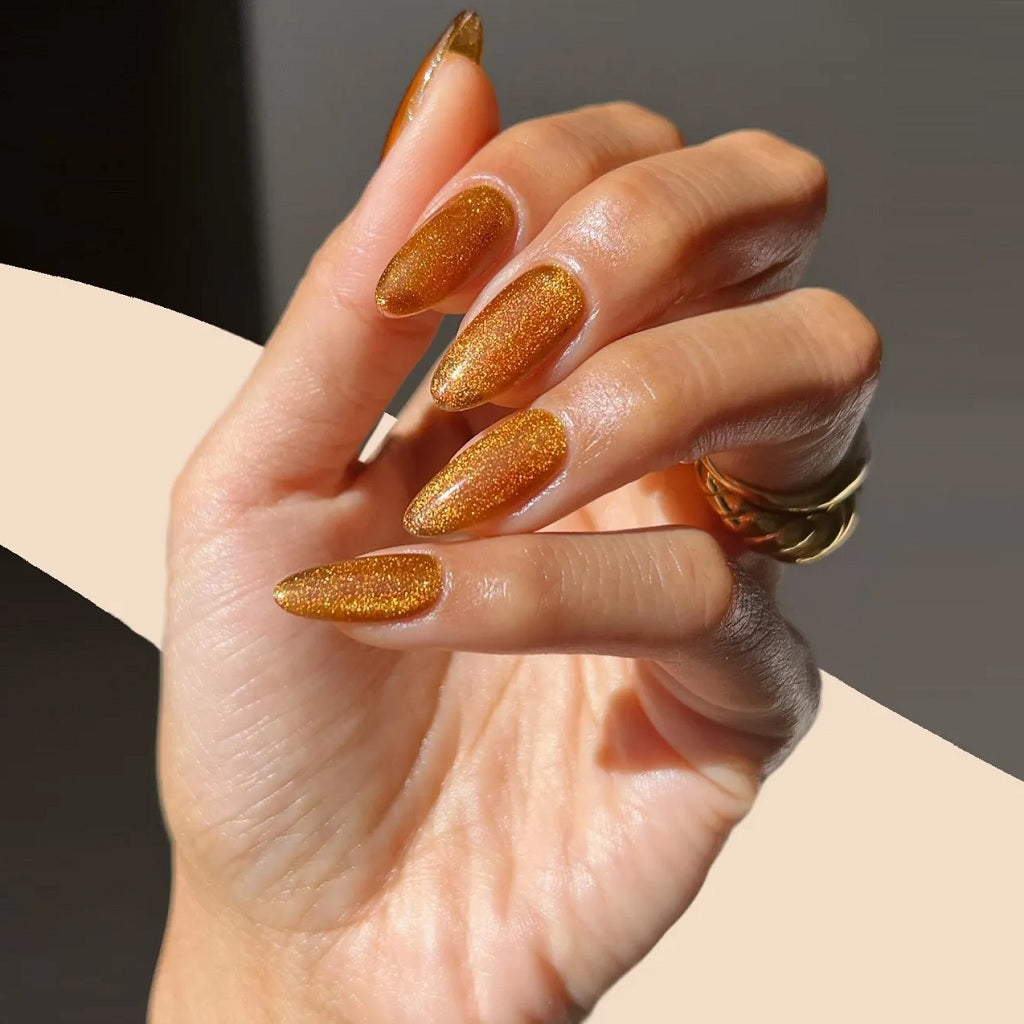
The leaves are changing, and so are trending nail colors. We're switching to warm, earthy autumn shades for a cozy, luxurious feel. That's why amber velvet nails are the perfect nail trend right now.
The creator is Melanie Graves, who you can find on Instagram. Her description is that the color is like changing fall leaves but sparkly. Therefore, amber velvet nails snuggle next to forest green and somber burgundy. They're like glazed donut nails with extra glitter.
Let’s talk about how to re-create this lovely autumn look on your fingertips.
The Best Polish for Amber Velvet Nails
At the time of writing, Melanie had yet to reveal the exact polish she used. Celebrity manicurists have taken a guess at the process. Some recommend either a honey-colored or orange base with a glittery top coat.
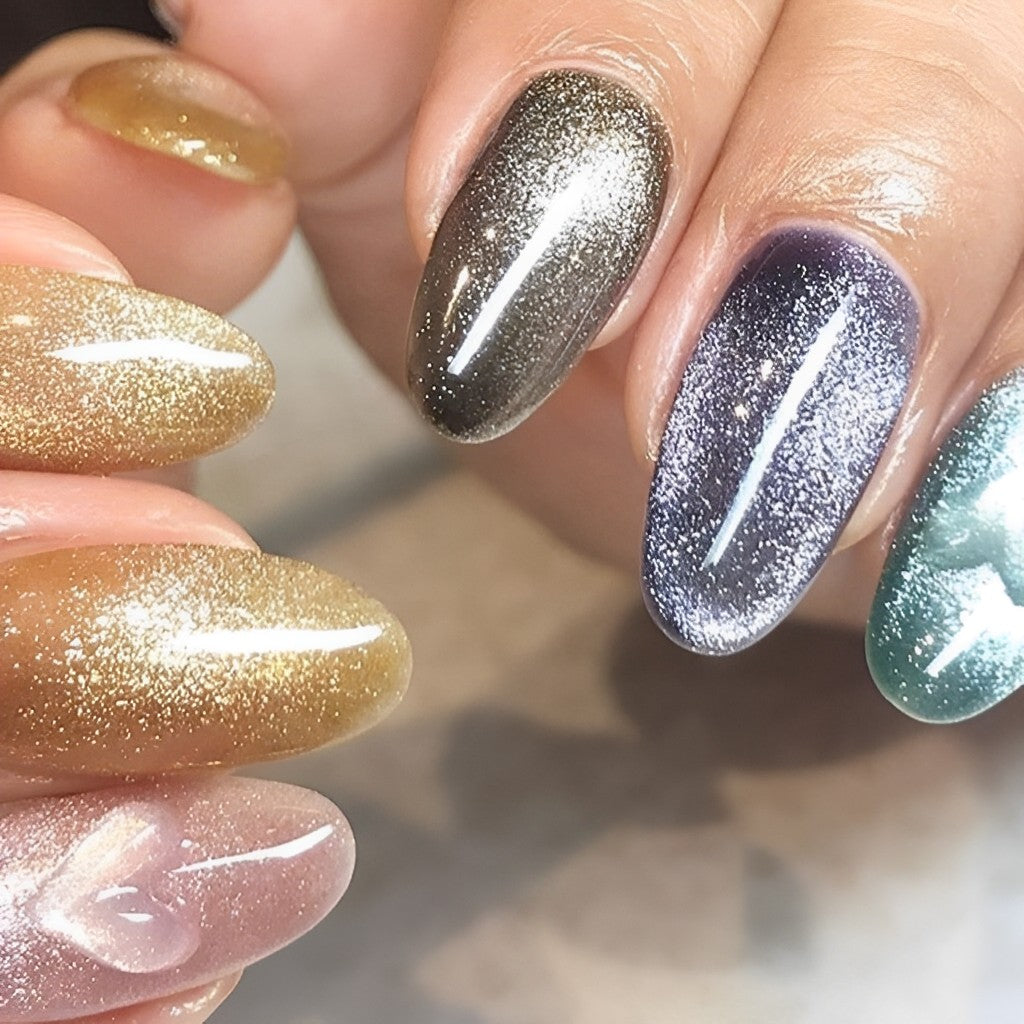
But we have an easier alternative. All you need are cat eye gels! They are magnetic glitter polishes with just the right effect for velvet nails. They can be layered to create a stunning illusion of depth.
Check out the Cozy Cashmere cat eye colors, for instance. There's a lovely amber-colored shade with plenty of sparkle. It closely resembles the original amber velvet look.
Since this is magnetic polish, you can make designs in it with a magnet. So, instead of uniform shimmer across the nails, you can have sparkly tips or create a gradient effect. It will look like you rubbed the plush velvet nap on one part of the nails to make it shinier.
LAVIS Cat Eyes CE1 - Gel Polish - Cozy Cashmere Collection

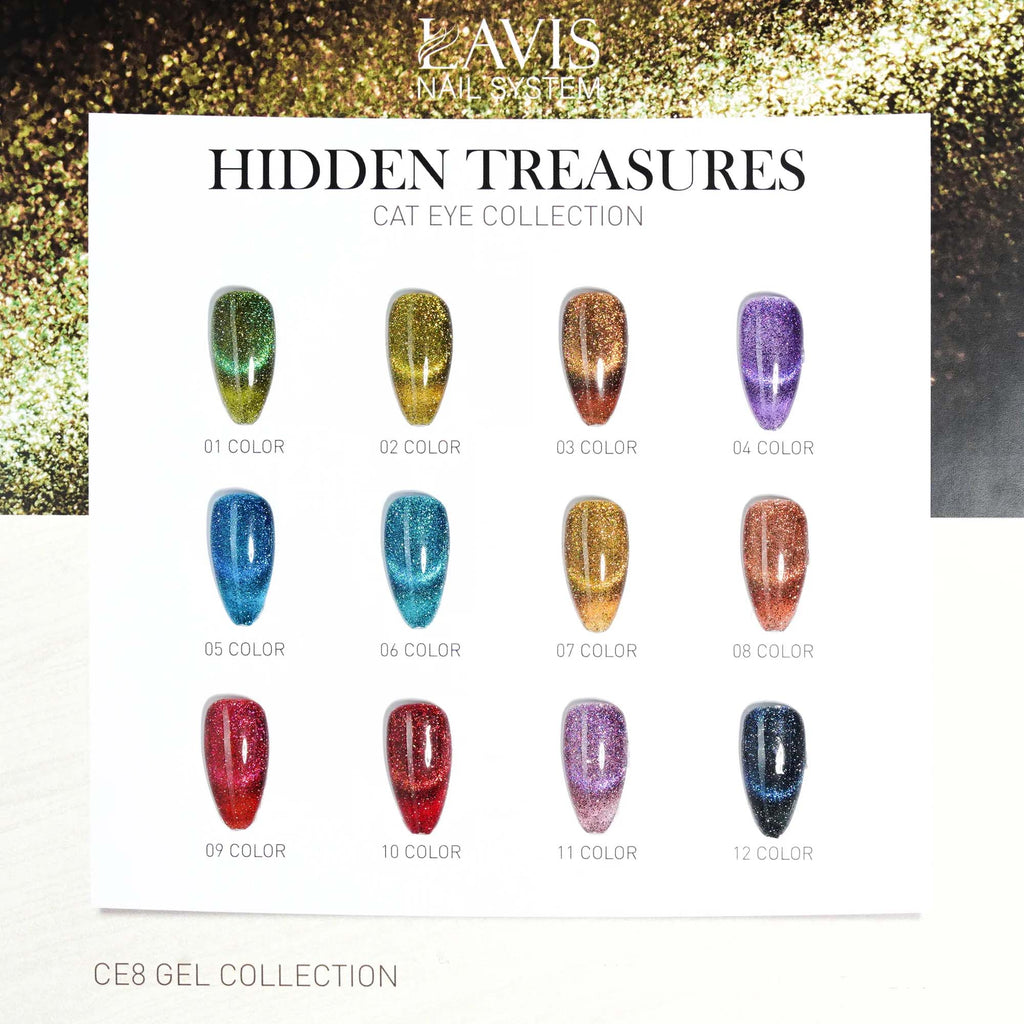
There's also a luxurious golden color in the Hidden Treasures Collection. It's ideal for creating a warm velour look on your nails. Since it's magnetic, you can make an ombre effect or concentrate the shiny particles on one side if you wish. Or you can use the polish without the magnet for a straightforward glitter effect. (Like any glitter polish, stir it often as you work).
What’s more, each of these cat eye polishes has a different appearance depending on the lighting and viewing angle, just like velvet fabric. They are downright hypnotic!
LAVIS Cat Eyes CE8 - Gel Polish - Hidden Treasures Collection
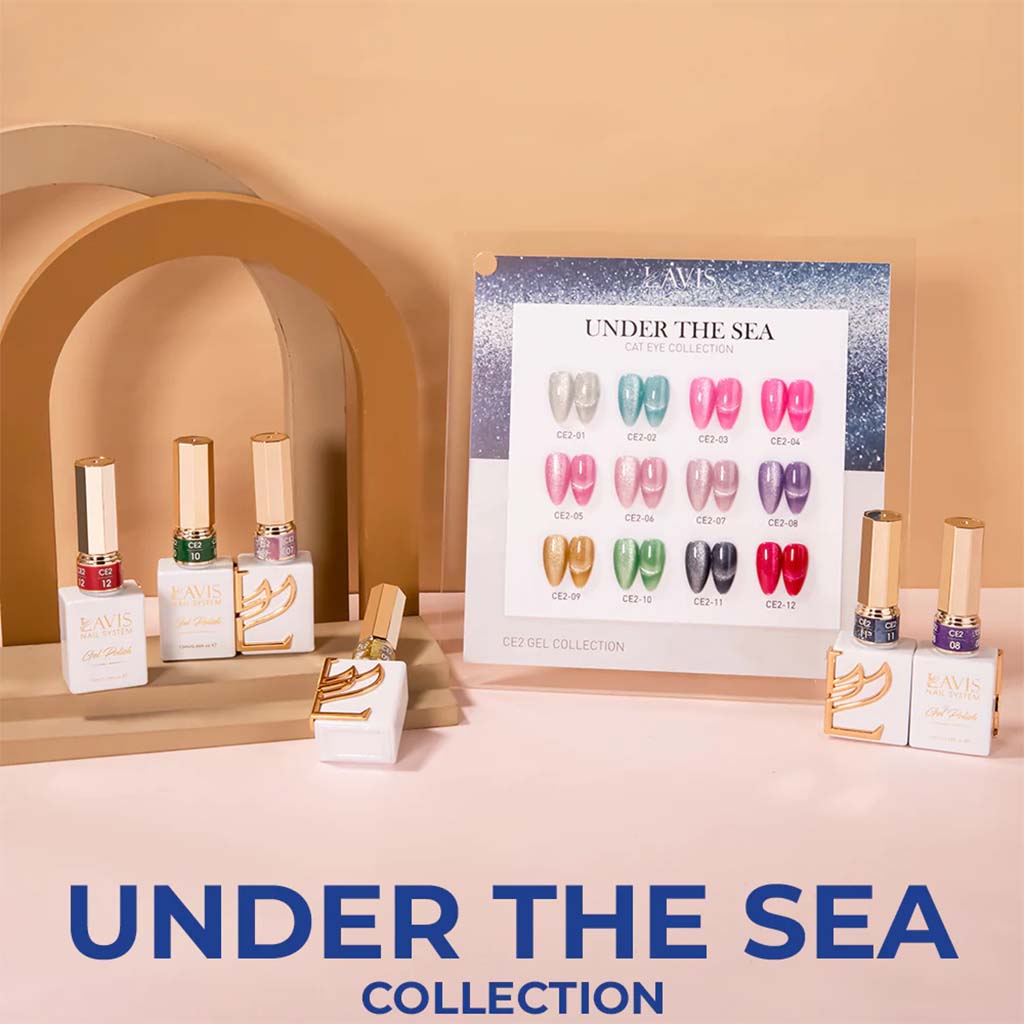
LAVIS Cat Eyes CE2 - Gel Polish - Under The Sea Collection
LAVIS Cat Eyes CE6 - Gel Polish - Mysterious Land Collection

Beyond Amber: Velvet Nails in Other Colors
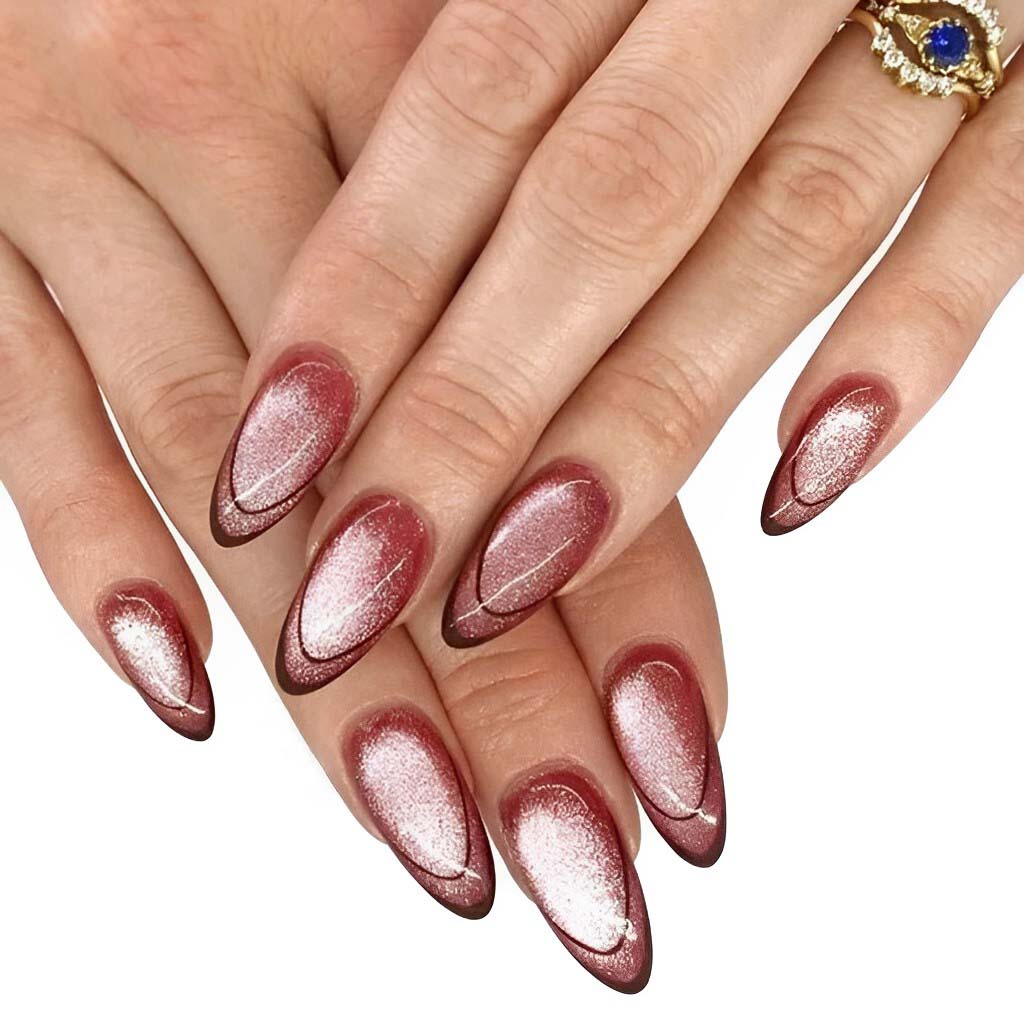
If you love the velvet look, why not experiment with other shades? It's so easy to do this nail design with cat eye gel polish. Just imagine all the different looks you can enjoy.
You know how when you rub velvet against the grain, it's a different color? The same thing happens when you change how the light hits these gels.
LDS Pearl CE Set - Pearl Veil Cat Eye Collection

How to Do Amber Velvet Nails at Home
Only a few supplies are needed for amber velvet nails with cat eye gel polish. The average time to completion is 60 to 90 minutes because each finger must be done individually.
Here are the things you need and the steps to follow.
First, you’ll need regular manicure tools to prepare your nails:
- Clippers, nail file, and buffer block
- Cuticle pusher
- Cuticle oil
- Polish remover
- Lint-free nail wipes
Before applying new polish, it's essential to thoroughly remove old polish. If you're wearing gels, use a coarse-grit file to rough up the surface of the polish (but not your nails) before soaking. This will allow the acetone to penetrate more efficiently and make it faster to remove.
Next, clip and shape the nails with a fine-grit (180-240) file. (Make sure the nails are dry when filing, or they may split).
Follow up with the buffer block to remove the shine from the surface. This step improves polish adhesion, so it won't lift. But use a light touch when buffing to avoid thinning the nails.
Then, push back the cuticles. If needed, use a cuticle softener cream and rinse afterward.
At this point, you can apply cuticle oil. It helps repair the damage from the acetone and makes cleaning mistakes from your skin simpler. However, you must wipe all the dust and oil from the nail plate before applying the base coat.
- Gel base and top coats
- A nail lamp, preferably LED, as it's more efficient
LAVIS Gel Base & Top

Brush on a thin layer of the base coat and cure it. Now you’re ready to do velvet nails. Since you’ll be using a magnet and working on each nail individually, plan on spending a little extra time.
Take the magnetic polish and warm the bottle in your hands. Roll it back and forth to mix the shiny particles because they settle on the bottom. Remember to stir the polish every so often while you work.
Choose one and paint it with the cat eye polish. Hover the magnet directly above the nail to attract the sparkles to the surface. Keep it close without touching your fingertip.
Another option is to hold the magnet with the repelling side close to each side of the nail for 5 to 10 seconds to push the particles into place.
Once you're pleased with the results, cure the nail and go on to the next.
If you're dissatisfied with how it looks, wipe off the polish if it's wet. Otherwise, add a new layer if it's dry, and try again.
Moreover, you can add additional layers for more depth and sparkle. Two or three should be sufficient.
Then, finish with a glossy top coat and another dose of cuticle oil.
Ta-da! Who will be the first to see your marvelous creation?
Conclusion
We're glad you visited us today. We wish we could see your beautiful amber velvet nails when you finish your manicure!
Now’s a great time to stock up on nail supplies and new colors. Not only do we have lots of sales, but we also offer free shipping on orders over $100.