
Let’s face it – painting our own toes is hard. It requires yoga positions and a lot of patience. But going to the salon takes time and money. Thankfully, there's a cheap and easy solution. Press-on toenails are a shortcut to the perfect pedicure!
If you’ve never tried press-on nails for your toes, there’s no time like the present. Just imagine how nice it will be to slip on sandals without worrying about what you'll look like.
In this article, we’ll cover two types of press-on toenails and the best way to do a pedicure at home.
How to Do Your Own Pedicure
Most of us have trimmed our toenails before. Instead, let’s talk about how to do a professional pedicure at home.
You’ll need a few supplies:
- a place to soak your feet (large bowl, bucket, bidet, etc.)
- foot file or pumice stone
- clippers
- orange stick or cuticle pusher
- moisturizer
- cuticle oil
- rubbing alcohol
- cotton pads
- acetone if you need to remove polish
- cuticle remover cream (optional but very helpful)
Those are the basic tools. Feel free to personalize the setup with bath salts or a pedicure spa kit.
Volcano Spa Beach Paradise Pedicure Kit
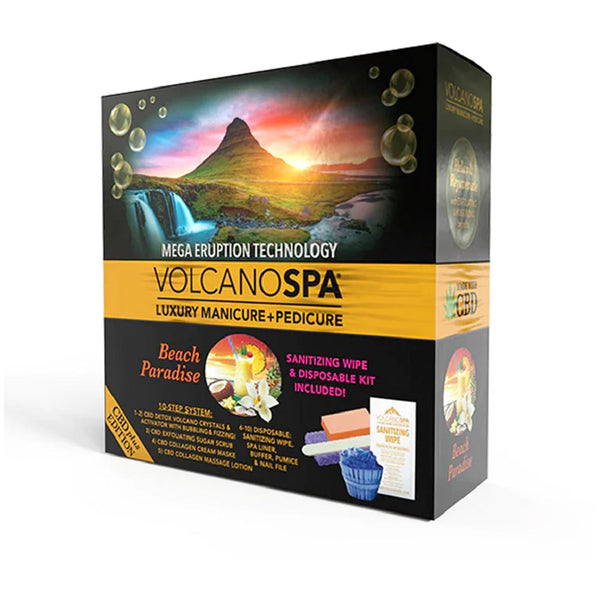
Treat your feet to a spa experience. This addictive kit includes a volcano activator to fizz away impurities and a sugar scrub to smooth rough skin.
There are ten steps total for a complete pedicure. Your feet will never be the same again!
If you have a hard time keeping track of your manicure and pedicure tools, you're not alone. They tend to disappear. It's easier to keep them corralled if you have a nice set like this:
Manicure Travel Kit
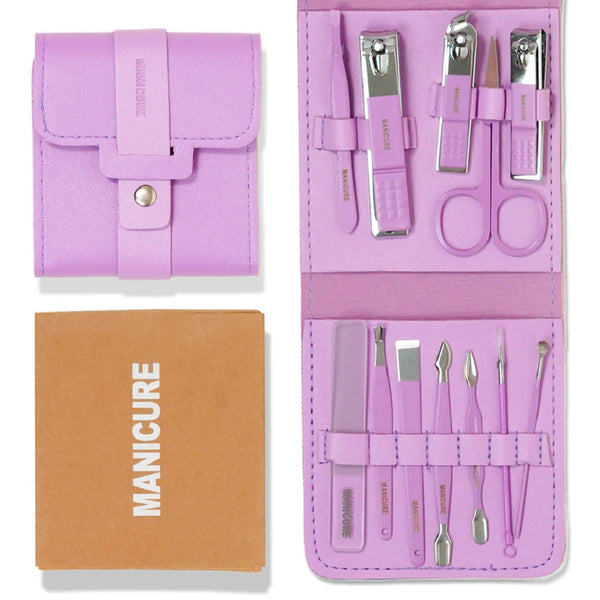
This kit is packed with everything you need to take care of all of your nails. From different sizes of clippers to pushers, a file, and scissors, it's all color-coded to match the carrying case. Moreover, everything can be disinfected for safety.
Pedicure Step by Step
Once you have all the tools ready, settle in and get comfy. Grab your acetone and remove the polish if needed.
Now, soak your feet in warm water for at least 5 minutes. Pull one out and pat it dry with a towel.
If your cuticles are soft, push them back. If not, you can apply cuticle remover and wait a little longer for the magic to happen. Cuticle cream can also reduce calluses.
Next, trim your nails. They don’t need to be perfect – that’s what the nail file is for.
Use a foot file or pumice stone on your calluses.
Finish up by applying cuticle oil and moisturizer. Then, repeat the steps on the other foot.
How to Apply Press-On Toenails
Once your feet are neatened up, it’s time for the press-ons.
Yes, you just moisturized everything. But now you’re going to go back and remove oily residue from the nails. Rubbing alcohol will do the trick. You can also use acetone. Soak a cotton pad and wipe each nail. This step makes sure that the adhesive will bond properly and the nails won’t lift.
Take a look at the different sizes of press-on nails in the package. Pick the ones that match your natural nails.
Next, you’ll either need to apply nail glue or use the press-on adhesive strips. Check the instructions. If you’re using nail glue, you only need a small dot just below the cuticle.
Dab on the glue and press the toenail down firmly for at least a minute. When you let go, the press-on should be flush and tight against the natural nail.
Do all the other toes. If you want to shape the tips, use a nail file. Don’t worry, they shouldn’t come loose.
Now you can apply cuticle oil once more and go show off your pretty toes!
Alternate Method: Gel Tips as Press-On Toenails
Did you know that you can use gel tips on your toes? They allow you to customize your look beyond drugstore press-ons.
For this method, you'll need a gel base coat and top coat, protein bond, soft gel adhesive, and a nail lamp. Remember the colored gel polish, too.
Begin by doing a pedicure as usual. Then apply the protein bond to each nail. It's a primer that reduces now oil and improves adhesion.
Follow up with the base coat and cure it.
One by one, place a dab of adhesive on each gel tip and press it on a nail. With each nail, cure the tip for ten seconds before moving on to the next. This action helps the adhesive partially dry to hold the tip in place while you finish.
Once all the tips are in place, cure the whole foot for at least 30 seconds or up to 60. Now you can finish with a top coat or do colored polish first.
How to Remove Press-on Toenails
If you’ve put gel tips on your toes, you can soak them off with acetone. The same goes for regular press-on nails.
Pour acetone into a basin and stick in your toes for 15 to 20 minutes. By that point, the press-ons should have started lifting by themselves and they will be easy to peel off.
Use an orange stick to push off adhesive residue. Wipe the toes with an acetone-soaked cotton pad. Then apply cuticle oil and moisturizer as acetone is very drying.
If you’re not a big fan of acetone and you’ve been wearing the press-on toenails for a few days already, you can try soaking them off in hot water with a few drops of baby oil. It’ll take about 20 to 30 minutes.
How Long Does a Pedicure with Press-on Toenails Last?
The nail glue used for press-ons is durable stuff. Therefore, press-on toenails might last as long as three weeks!
Conclusion
We hope you have fun with your press-on pedicure! If you have questions about our products or your order, feel free to contact us.