
Wondering how to DIY cherry nail designs to wear this summer? Then you’re in the right place. Not only will we explain how to do cherry nails, but we'll also show you cute cherry nail ideas!
Supplies Needed to Do Cherry Nail Designs
Let’s jump right in with what you’ll need to paint sweet little cherries on your nails:
- Pink, red, or burgundy polish depending on the color of the cherries.
- White or a deep red shade to give the cherries highlights or depth if desired.
- Sheer nude or clear polish for underneath the cherries (not required if you’re using a base coat).
- Green polish for the stems and leaves.
- Base and top coats plus a nail lamp if you’re using gel polish.
- A nail art brush for fine details.
- Manicure tools for preparing the nails.
- Cuticle oil for a salon-worthy finish.
These are the key ingredients for a successful cherry nail manicure. But if you would rather not paint the cherries, there are alternatives like cherry nail stickers or using red gemstones for 3D cherry nails.
Got everything? Then let’s get started!
How to DIY Cherry Nail Designs
We understand that you're eager to get those cherry nails done. Be sure to complete all steps so that your fruit-filled manicure looks delicious.
- The first step toward a picture-perfect finish is trimming and shaping the nails and pushing back the cuticles.
- Next, remove oil from the nail plate by wiping with rubbing alcohol or a nail wipe.
- Apply a base coat if you're using gels (you can use a base coat for nail lacquer, too). This crucial step makes the manicure more chip-resistant and long-lasting and protects the natural nail from staining and damage.
- Apply the sheer or clear polish. This step is optional if you've applied a base already. Alternatively, you can use any color if it makes the cherries stand out.
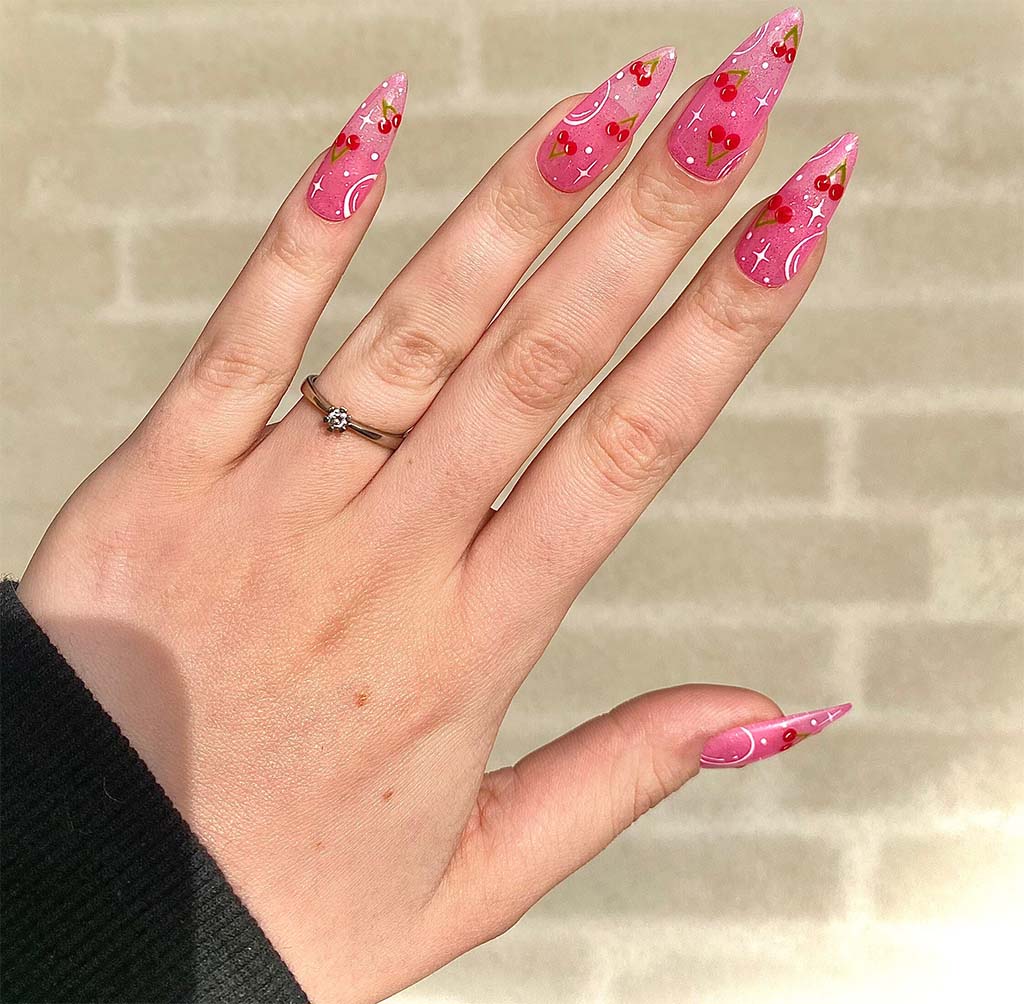
- Now it's time to paint the little fruits. We recommend using a thin nail art brush because it's easier to make small dots. Place two little circles of cherry-colored polish on the nail. Make one slightly larger than the other, or offset them slightly. Moreover, the cherries can be in different places on every nail. Just keep them close enough together that you can draw stems between them.
- Take either the white or deeper red polish and paint reflective highlights or shade the fruit to give it more texture. For example, a white highlight is as simple as making a short, thin, curved line at the edge of the cherry where the shiny skin would reflect the light. (See the image below.) And using the darker-colored polish can make the fruit look more realistic and touchable.
- Next, use the green polish and a skinny brush to create an upside-down V uniting the cherries. Draw one leaf off to the side of the stem. Ta-da! You have cherries on your nails!
- Wrap up with a glossy top coat and cherry-scented cuticle oil to celebrate!
FYI: there’s an advantage to working with gel polish versus nail lacquer. Gels won’t dry until you cure them with a nail lamp so you have all the time you need to perfect your nail art.
Now that you’ve mastered doing cherry nails, add them to your next emoji nail art manicure, too!
Cherry Nail Ideas to Wear This Summer
There’s a lot you can do with cherry nails this summer. Here are fun and easy cherry nail designs to try at home.
French Tips with Cherries on Top
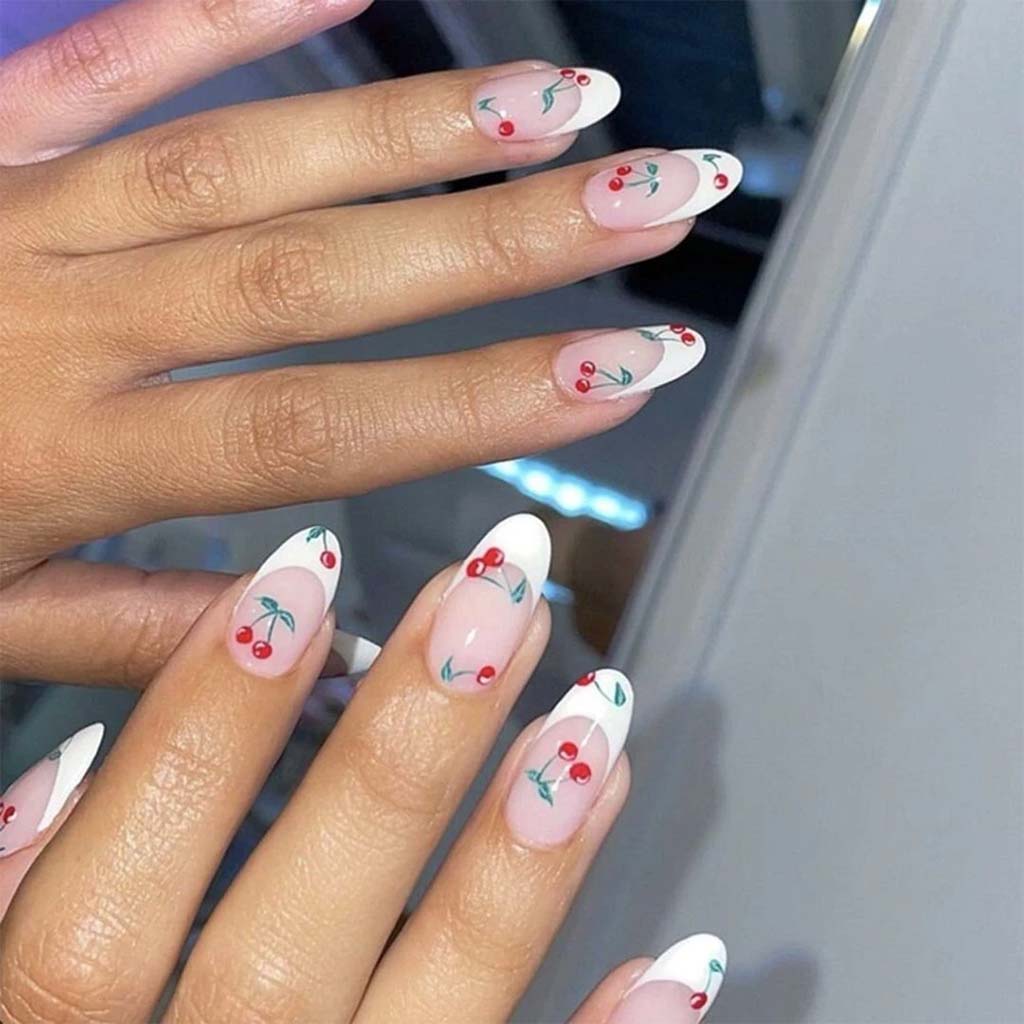
We love this tasty way to top off a French manicure. You’ll need a sheer pink for the base, red for the cherries, white for the nail tips and the highlights on the cherries, and green for the stems and the leaves. A glossy top coat will make everything sleek and shiny.
Neon Maraschino Nails
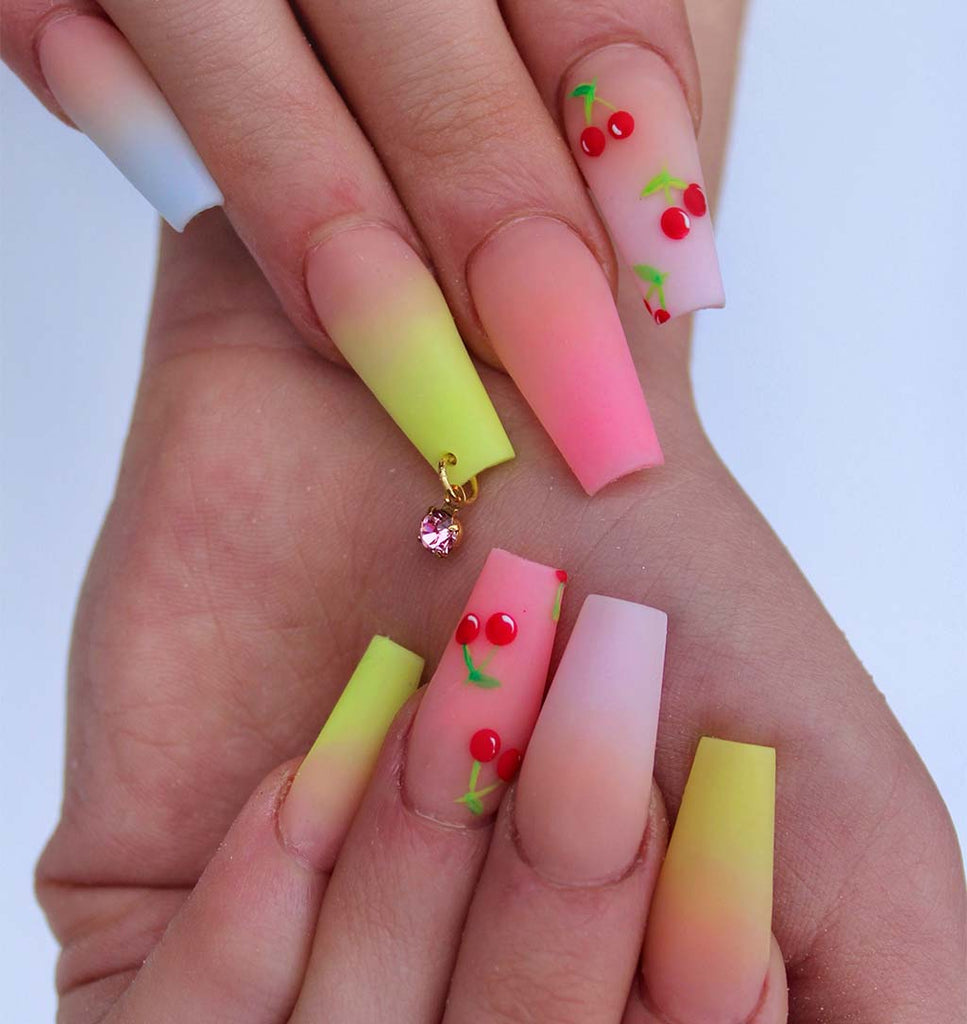
To achieve this sweet summertime look, you’ll need to know how to do ombre nails first. This tutorial makes it look easy. Cap it off with delicate little cherries and a matte top coat for a sophisticated finish.
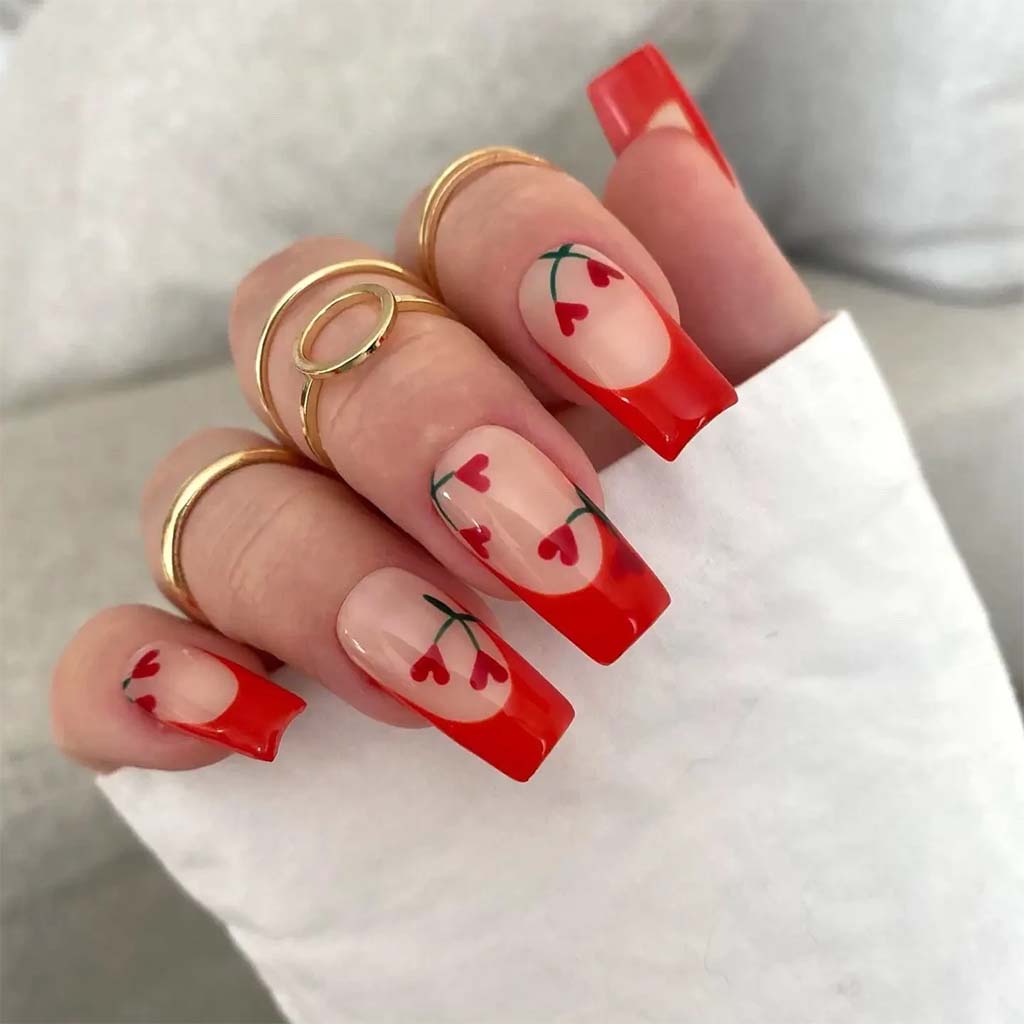
Heart-shaped Cherry Nails
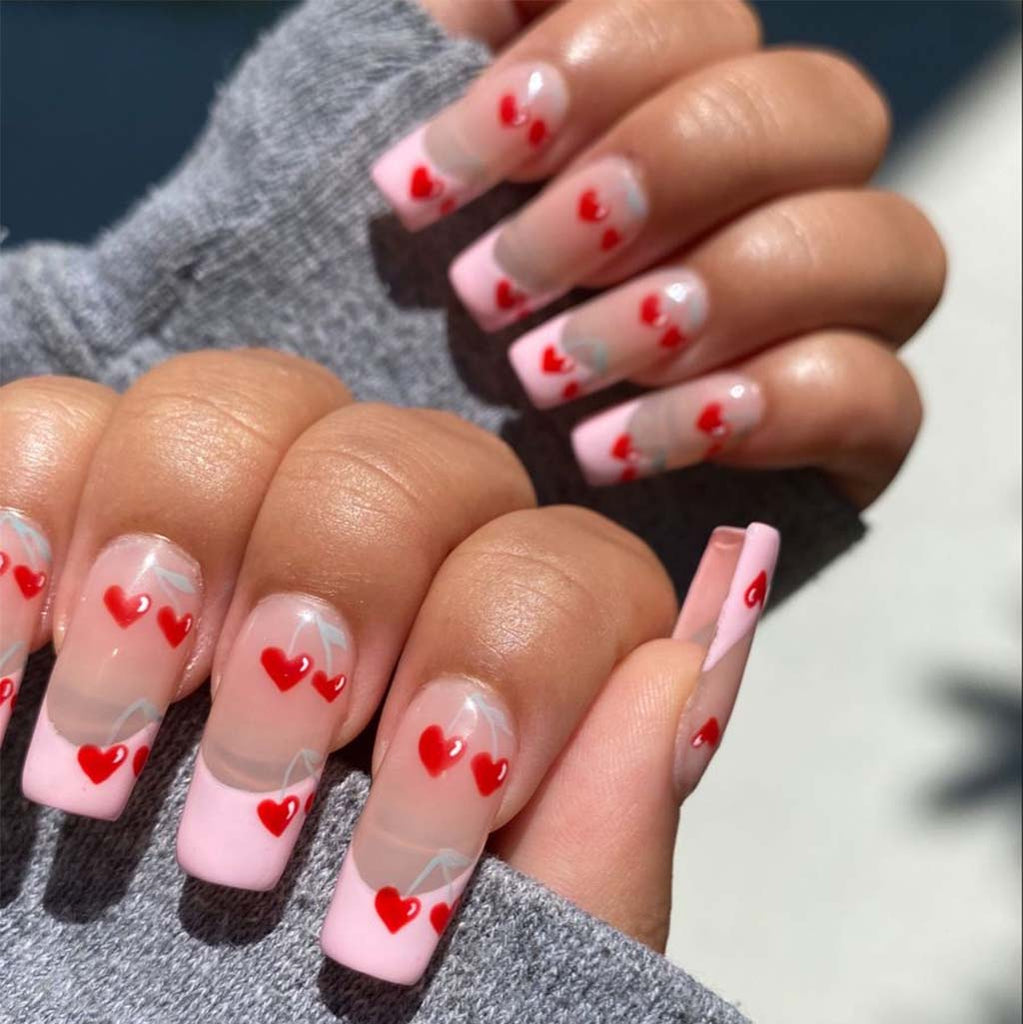
If you look at them from the right angle, cherries sometimes look like plump little hearts.
Cherry Glitter Nails
There’s no reason you have to be traditional. We adore these glittery 3D cherry nails done with either builder gel or acrylics.
If you don’t want to go with Barbie pink polish, may we suggest using cherry red line art gel. It comes with a thin nail art brush in the bottle.
LDS - 11 Cherry Red - Platinum Line Art Gel
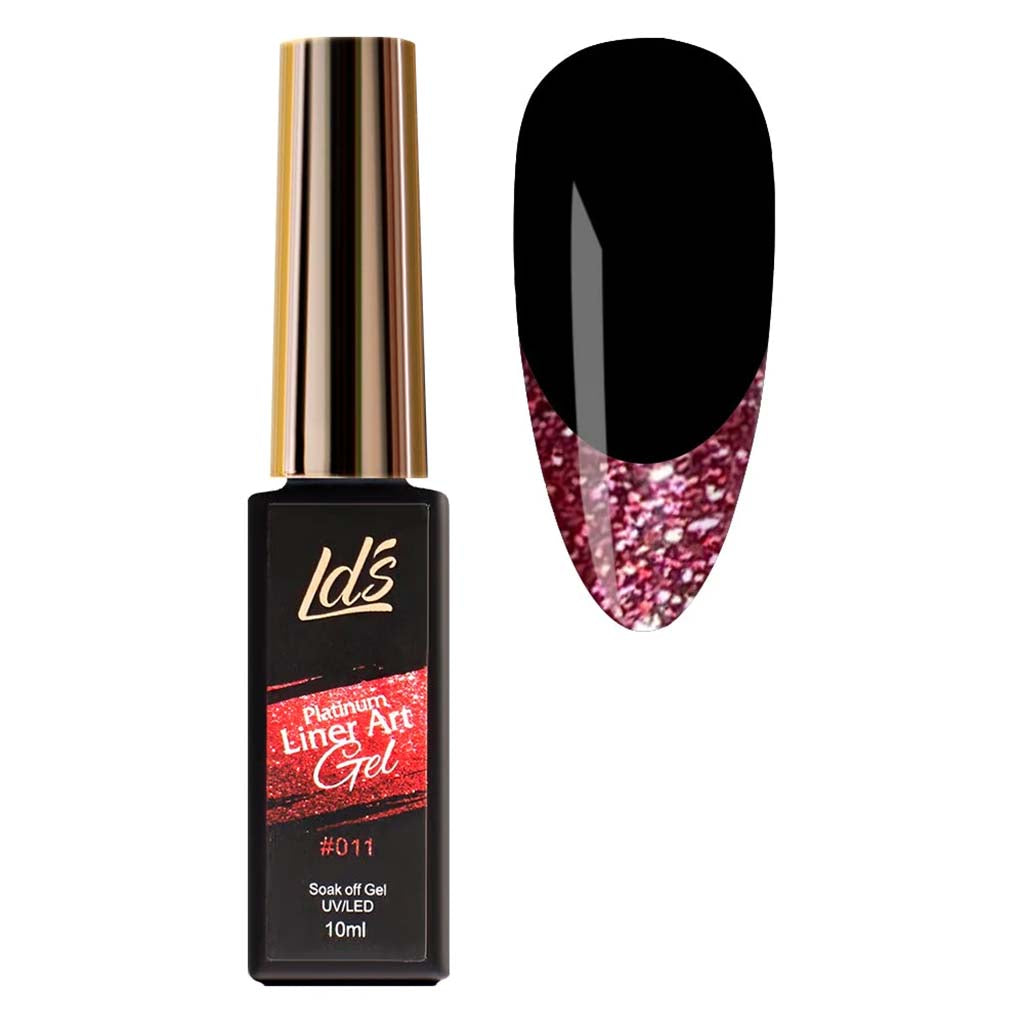
This color is so pretty we want to use it for everything! If you’ve never tried line art gel, you’re missing out. Unlike regular polish, it comes with an ultra-thin brush for precision drawing. Moreover, since it’s a gel, it’s odorless and creamy smooth. Brush it on and wipe it off if you’re not satisfied. It won’t dry until you cure it with a nail lamp. Then it will last for weeks without chipping, fading, or peeling.
FAQS about Cherry Nail Designs
Q: How hard is it to do cherry nails with nail lacquer?
A: It’s not hard at all – the trick is just waiting until each layer is completely dry before adding the next. Also, be careful to not rework the polish too much because the top layers may cause the lower layers to dissolve. (Betcha didn’t know you could remove nail polish with nail polish!)
Q: Can cherry designs be done on short nails?
A: Of course, they can – you can make the cherries any size you want and put as many or as few on each nail as you wish.
Q: Does it count if the cherry nails aren’t pink or red?
A: We’ve seen gorgeous cherry nails with white fruit or black cherries on a pink background. The trick is to keep the fruit shaped like a cherry so that it’s easy to identify.
Conclusion
We hope you enjoyed learning how to DIY cherry nail designs for a summer manicure. We’d love to help you get all the supplies you need at a discount. Drop by our deals to see what's on sale, and remember we offer free shipping on orders over $100!